
-
By:
- terrence
- No comment
orbit 1-station electronic sprinkler timer manual
Orbit 1-Station Electronic Sprinkler Timer Manual: A Comprehensive Guide
This manual details installation, operation, and troubleshooting for your Orbit 1-station timer, ensuring efficient lawn watering and providing a user-friendly experience.
Welcome to simplified lawn irrigation! The Orbit 1-Station Electronic Sprinkler Timer is designed for homeowners seeking an easy-to-use, reliable system for automating their watering schedule. This timer controls a single zone of sprinklers, offering convenience and water conservation. It eliminates the need for manual valve operation, ensuring your lawn receives consistent hydration, even when you’re away.
This guide provides comprehensive instructions, from initial setup and programming to advanced features and troubleshooting. Whether you’re a first-time timer user or experienced with irrigation systems, this manual will empower you to maximize the benefits of your Orbit timer. Proper installation and programming will contribute to a lush, healthy lawn while minimizing water waste and saving you valuable time.
What’s Included in the Box
Upon opening your Orbit 1-Station Electronic Sprinkler Timer package, please verify that all components are present. You should find the Orbit 1-Station Timer unit itself, designed for outdoor use and weather resistance. Included is a detailed user manual – this document – to guide you through setup and operation. Additionally, you’ll receive mounting screws and anchors for secure installation on a wall or suitable surface.
Please note that wire connectors are often included for simplified electrical connections to your sprinkler valves; However, depending on the specific model, these may need to be purchased separately to ensure compatibility with your existing wiring. Retain all packaging and documentation for future reference or warranty claims. If any components are missing, contact customer support immediately.
Safety Precautions
Important: To prevent electrical shock and ensure safe operation, always disconnect power to the sprinkler system at the breaker box before installing or servicing the timer. Never handle the timer with wet hands or expose it to excessive moisture. This device is designed for outdoor use, but avoid direct submersion in water.
Installation should be performed by a qualified individual familiar with electrical wiring. Ensure all wiring connections are secure and comply with local electrical codes. Do not attempt to disassemble or repair the timer yourself; contact customer support for assistance. Keep small parts away from children. Regularly inspect the timer and wiring for damage, and replace any worn or damaged components immediately.

Installation
Proper installation involves securely mounting the timer, correctly wiring the electric valves, and establishing a reliable power connection for optimal performance.
Locating and Mounting the Timer
Choosing the right location is crucial for your Orbit 1-Station Timer’s longevity and ease of use. Select a sheltered spot protected from direct sunlight, rain, and extreme temperatures – an attached garage or shed is ideal. Ensure the location is within reach of a GFCI-protected power outlet and reasonably close to the valves you’ll be controlling.
Mount the timer securely to a wall using appropriate screws (not included). The timer should be positioned at a comfortable height for viewing the display and accessing the buttons. Avoid mounting it directly on metal surfaces, as this can interfere with the wireless signal if your model has wireless capabilities. Double-check that the mounting surface is stable and can support the timer’s weight. Proper mounting prevents damage and ensures reliable operation.
Wiring Electric Valves to the Timer
Before wiring, always disconnect the power supply to the timer! Identify the valve wires – typically color-coded. Connect each valve’s common wire to the “COM” terminal on the timer. Then, connect each valve’s solenoid wire to one of the numbered terminals (1-4, depending on the model), corresponding to the zone it controls.
Ensure all wire connections are secure and weatherproof. Use wire connectors suitable for outdoor use. Incorrect wiring can damage the timer or valves. Double-check your connections against the timer’s wiring diagram. If you’re unsure about any step, consult a qualified electrician. Proper wiring guarantees efficient and reliable zone control for your sprinkler system.
Connecting the Power Source
The Orbit 1-Station Timer requires a standard 120V AC power source. Locate a grounded outdoor outlet near the timer’s installation location. Never use an extension cord. Plug the timer’s power adapter directly into the outlet. Ensure the outlet is protected by a Ground Fault Circuit Interrupter (GFCI) for safety.
If a GFCI outlet isn’t available, have one installed by a qualified electrician. Verify the power supply voltage matches the timer’s requirements. After connecting, the timer should power on, displaying the current time (if previously set). If it doesn’t, check the outlet and the power adapter connection.

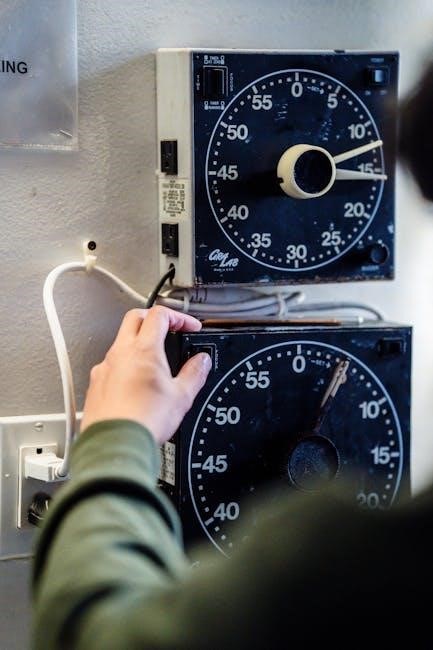
Understanding the Timer Interface
Familiarize yourself with the display, buttons, and indicator lights for easy programming and monitoring of your Orbit 1-Station timer’s watering functions.
Display Overview
The Orbit 1-Station timer’s display provides crucial information at a glance. Typically, you’ll find a large LCD screen showcasing the current time, the scheduled start time for Zone 1, and the remaining watering duration.
Several icons illuminate to indicate the timer’s status. A clock icon confirms the correct time is set. A water drop icon signifies that a watering cycle is currently in progress. A rain delay icon will be lit if the rain delay function is active, pausing scheduled watering.
The display also shows the day of the week and may include indicators for manual mode or seasonal adjustment settings. Understanding these visual cues is essential for effectively managing your irrigation system and ensuring optimal water usage.
Button Functions
The Orbit 1-Station timer features intuitive button controls for easy programming. The “Set” button initiates programming mode, allowing adjustments to time, duration, and start times. “Menu” navigates through different settings and options within the timer’s interface.
“Up” and “Down” arrow buttons increment or decrement values during programming, such as minutes for watering duration or hours for start times. A “Run/Stop” button manually starts or stops the watering cycle, overriding the programmed schedule;
The “Rain Delay” button activates the rain delay function, pausing watering for a specified period. Familiarizing yourself with each button’s function streamlines the programming process and ensures precise control over your sprinkler system.
Indicator Lights
The Orbit 1-Station timer utilizes several indicator lights to convey operational status. A “Low Battery” light illuminates when battery replacement is needed, preventing programming loss. The “Watering” light flashes during active watering cycles, providing visual confirmation of operation.
A “Rain Delay” light indicates when the rain delay function is active, pausing scheduled watering. The “Manual” light signals that the system is operating in manual override mode, bypassing the programmed schedule.
Understanding these indicator lights allows for quick assessment of the timer’s status and troubleshooting potential issues, ensuring optimal sprinkler system performance and efficient water usage.

Programming the Timer
This section guides users through setting the current time and establishing a customized watering schedule for optimal lawn and garden hydration.
Setting the Clock
Accurate timekeeping is crucial for your Orbit 1-Station timer to function correctly. Begin by pressing the “Set Clock” button – it may be labeled differently, such as “Time” or “Clock”. The display will likely flash the current hour. Use the “Hour” and “Minute” buttons to adjust the time accordingly.
Pay close attention to the AM/PM indicator; ensure it reflects the correct time of day. Some models may require you to cycle through the hours until the desired time appears. Once the correct hour is set, press the “Set Clock” button again to move to the minutes. Repeat the adjustment process for the minutes. Finally, press “Set Clock” one last time to save the new time. A confirmation signal, like a beep or a display change, will indicate successful clock setting.
Programming the Watering Schedule (Zone 1)
To program Zone 1, first press the “Program” button, initiating the schedule setup. The display will likely show “Zone 1” or a similar indicator. Next, select the desired start time using the “Hour” and “Minute” buttons. Then, determine the watering duration – how long you want Zone 1 to run – again using the adjustment buttons.
Specify the watering days. You can choose specific days of the week, or options like “Every Other Day” or “Weekdays Only”. Confirm each selection by pressing “Set” or “Enter”. The timer will store this schedule for Zone 1. Repeat this process for any additional zones, if your timer supports multiple zones.
Adjusting Watering Duration
To modify the watering duration for a specific zone, navigate to the zone’s programming screen. Typically, this involves pressing the “Program” button and selecting the desired zone (Zone 1 in this case). Once the zone is selected, locate the “Duration” or “Water Time” setting.
Use the “Hour” and “Minute” buttons to increase or decrease the watering time. The timer usually displays the current duration. Ensure the duration aligns with your landscaping needs and local water restrictions. Confirm the new duration by pressing “Set” or “Enter”. The timer will then apply the adjusted duration to the selected zone’s schedule.
Setting Start Times
To establish watering start times, access the programming mode for Zone 1. Press “Program” and select Zone 1. Locate the “Start Time” setting; this is where you define when watering begins. Utilize the “Hour” and “Minute” buttons to input your preferred start time. Many timers allow multiple start times per zone, enabling split watering cycles.
Consider local water restrictions and sunlight exposure when choosing start times. Press “Set” or “Enter” to confirm each start time. Review all programmed start times to ensure they align with your desired watering schedule. The timer will initiate watering at the specified times.

Advanced Features
Explore enhanced functionalities like Rain Delay, Manual Override, and Seasonal Adjustment, optimizing water usage and providing flexible control over your irrigation system.
Rain Delay Function
The Orbit 1-Station Timer incorporates a convenient Rain Delay function, allowing you to temporarily suspend scheduled watering during periods of rainfall. This feature prevents overwatering and conserves water resources. To activate Rain Delay, typically you’ll need to press and hold a designated button on the timer’s interface.
The timer will then prompt you to enter the duration of the delay, usually in days. You can often select a delay ranging from 1 to 7 days, or sometimes even longer, depending on the model. While active, the Rain Delay indicator light will illuminate, confirming the function is engaged. The timer will automatically resume its programmed schedule once the specified delay period has elapsed, ensuring your lawn receives the appropriate amount of hydration when needed.
Manual Override Mode
The Orbit 1-Station Timer offers a Manual Override mode, providing immediate control over your watering schedule. This is useful for situations requiring instant watering, regardless of the programmed settings. Typically, activating Manual Override involves pressing a specific button, often labeled “Override” or “Manual.”
Once engaged, the timer will initiate watering for a pre-set duration, or allow you to specify a custom run time for each zone. The Manual Override function temporarily bypasses the regular schedule, ensuring your lawn receives water when you need it. A visual indicator, like a flashing light, confirms the override is active. Remember to deactivate the override to return to the normal programmed schedule.
Seasonal Adjustment
The Orbit 1-Station Timer’s Seasonal Adjustment feature allows you to fine-tune your watering schedule based on changing weather conditions throughout the year. This prevents over or under-watering, conserving water and promoting healthy plant growth. Typically expressed as a percentage, this adjustment increases or decreases watering duration across all zones.
For example, a +10% adjustment increases watering times by ten percent, ideal for hot, dry summers. Conversely, a -20% adjustment reduces watering, suitable for cooler, wetter seasons. This global adjustment simplifies schedule management, eliminating the need to manually alter each zone’s duration. Regularly adjusting seasonally optimizes water usage and maintains a vibrant landscape.
Troubleshooting
This section provides solutions for common issues, including power failures, valve malfunctions, and incorrect time displays, ensuring your Orbit timer functions optimally.
Timer Not Powering On
If your Orbit 1-Station timer fails to power on, begin by verifying the power source connection. Ensure the transformer is securely plugged into a working electrical outlet and that the timer’s power cable is firmly connected to the transformer. Check the circuit breaker to confirm it hasn’t tripped.
Next, inspect the transformer itself for any visible damage. A faulty transformer will prevent the timer from receiving power. If using batteries as a backup, confirm they are fresh and correctly installed, observing proper polarity. A low battery can sometimes prevent operation even with a plugged-in transformer. Finally, examine the timer’s internal fuse (if applicable) and replace it if blown, using the correct amperage rating.
Valves Not Activating
If your sprinkler valves aren’t activating with the Orbit 1-Station timer, first double-check the wiring connections between the timer and each valve. Ensure wires are securely fastened to the terminals and haven’t become loose or corroded. Verify the zone is properly programmed within the timer’s schedule, including correct start times and durations.
Confirm the valve solenoids are functioning correctly by manually testing them with a low-voltage power source. A faulty solenoid will prevent the valve from opening. Also, inspect the valve itself for any obstructions or mechanical issues. Low voltage or a break in the wiring can also cause this issue; check for damaged wires.
Incorrect Time Display
An incorrect time display on your Orbit 1-Station timer requires immediate attention for accurate scheduling. Begin by verifying the timer’s battery; a low battery can cause time inaccuracies or resets. Carefully reset the clock following the instructions in the “Setting the Clock” section of this manual, ensuring you select the correct AM or PM designation.

If the issue persists, check for any interference from nearby electronic devices. In rare cases, power fluctuations can also disrupt the timer’s internal clock. If resetting doesn’t resolve the problem, consider a full timer reset to factory defaults, then re-program the correct time and schedule.

Maintenance
Regular cleaning, battery checks, and proper winterization will extend the life of your Orbit timer, ensuring reliable performance season after season;
Cleaning the Timer
To maintain optimal performance, periodically clean your Orbit 1-Station Electronic Sprinkler Timer. Begin by disconnecting the power source to ensure safety during cleaning. Use a damp, soft cloth to wipe down the exterior casing, removing any dirt, dust, or debris that may have accumulated.
Avoid using harsh chemicals, abrasive cleaners, or excessive water, as these can damage the timer’s components. For stubborn dirt, lightly dampen the cloth with a mild soap solution, then wipe and follow with a clean, damp cloth to remove any soap residue.
Pay particular attention to the display screen and button areas, ensuring they are free from obstructions. After cleaning, allow the timer to dry completely before reconnecting the power source and resuming normal operation. Regular cleaning helps prevent corrosion and ensures accurate functionality.
Battery Replacement
Your Orbit 1-Station Timer utilizes batteries to maintain the programmed schedule during power outages. When the low battery indicator appears on the display, it’s time for replacement. First, disconnect the timer from its power source. Locate the battery compartment, typically on the side or back of the unit, and open it.
Remove the old batteries, noting their correct polarity (+ and -). Install fresh batteries of the same type, ensuring proper alignment. Close the battery compartment securely. The timer should automatically reset and retain your programmed settings.
It’s recommended to replace batteries annually, even if the low battery indicator hasn’t illuminated, to prevent unexpected schedule loss. Dispose of old batteries responsibly, following local regulations.
Winterizing the Timer
Proper winterization protects your Orbit 1-Station Timer from freezing temperatures and potential damage. Before the first frost, disconnect the timer from both the power source and the valve wires. Remove the timer from its mounting location and bring it indoors to a dry, protected area.
If complete removal isn’t possible, disconnect all wiring and cover the timer with a waterproof cover or plastic bag. Ensure the cover allows for ventilation to prevent condensation buildup.
Remove the batteries to prevent corrosion during prolonged storage. Store the timer in a temperature-controlled environment. In spring, inspect the timer for any damage before reinstalling and reconnecting.

Warranty Information
This Orbit timer is warranted against defects for a specified period; contact customer support for coverage details and to initiate a claim process.
Coverage Details
Orbit warrants this 1-Station Electronic Sprinkler Timer against manufacturing defects in materials and workmanship for a period of one year from the date of original purchase. This warranty extends only to the original purchaser and does not cover damage resulting from misuse, abuse, neglect, improper installation, unauthorized modification, or acts of God.
Specifically excluded are issues caused by low or inconsistent water pressure, frozen pipes, or electrical surges. The warranty does not cover normal wear and tear, battery replacement, or cosmetic damage. To obtain warranty service, you must provide proof of purchase and return the defective product, prepaid, to Orbit’s designated service center.
Orbit, at its option, will repair or replace the defective timer. This warranty is your exclusive remedy, and Orbit is not liable for incidental or consequential damages.

Contacting Customer Support
For assistance with your Orbit 1-Station Electronic Sprinkler Timer, several support options are available. You can visit the Orbit Irrigation website at www.orbitonline.com for frequently asked questions, downloadable manuals, and troubleshooting guides. A comprehensive knowledge base is readily accessible online.
Alternatively, you can contact Orbit’s customer support team directly via phone at 1-800-ORBIT-21 (1-800-672-4821) during regular business hours, Monday through Friday. Email support is also offered through the website’s contact form. When contacting support, please have your model number and date of purchase readily available to expedite the process.
Detailed product documentation and helpful videos are also available on Orbit’s YouTube channel.